Packing a backpack may seem simple at first glance, but for beginners, it can be a bit challenging to ensure everything fits without making the pack too heavy or uncomfortable. Whether you’re preparing for a day hike, weekend camping trip, or a multi-day trek, understanding how to pack a backpack as a beginner is crucial to having a smooth and enjoyable journey. Efficient packing not only makes it easier to find items when you need them but also helps distribute weight evenly, reducing strain on your back and shoulders.
This guide is designed specifically for beginners, breaking down the essentials of what to bring, how to organize, and where to place each item within your backpack. We’ll cover key tips on weight distribution, accessibility, and how to make use of your backpack’s compartments and straps for maximum comfort and efficiency. Whether you’re a first-time hiker or new to outdoor adventures, learning how to pack strategically can transform your experience, ensuring you’re prepared and comfortable throughout your journey. Read on to discover how to pack a backpack – a beginner’s guide to help you hit the trail with confidence and ease.
Post Contents
- 1 Choose the Right Backpack for Your Trip
- 2 Organize Items by Weight and Importance
- 3 Use Packing Cubes for Efficient Organization
- 4 Pack Essentials for Easy Access
- 5 Use the Backpack’s Straps and Loops for Extra Gear
- 6 Roll Your Clothes for Space-Saving Efficiency
- 7 Test the Fit Before Heading Out
- 8 Packing Order for a 7-10 Day Trip with Osprey Exos 48 Backpack
- 9 Conclusion: How to Pack a Backpack – A Beginner’s Guide
Choose the Right Backpack for Your Trip
Selecting the right backpack is a foundational step when learning how to pack a backpack as a beginner. The type and size of your backpack depend on the length of your journey, the terrain, and the weather conditions you might encounter. A well-chosen backpack can enhance your comfort, organization, and ease of movement. To determine the best size, consider the duration of your trip: for day outings, a smaller bag will suffice, while extended adventures require a larger pack with extra capacity for all essentials.
Daypacks (20-30 Liters)
Daypacks are ideal for short trips, typically lasting a few hours to a single day. With a capacity of 20-30 liters, these packs can comfortably carry essentials like water, snacks, a first-aid kit, a light jacket, and some personal items. Their compact size and lightweight design make them perfect for hikers, commuters, or anyone wanting to explore without carrying too much weight. Many daypacks are equipped with hydration systems, allowing you to drink water on the go, and have multiple compartments to help keep your items organized. They’re also easy to adjust, making them suitable for a range of body types. Whether you’re going on a quick hike or sightseeing, daypacks offer the simplicity and convenience you need for a short adventure.
Overnight Packs (30-50 Liters)
For trips lasting one or two nights, an overnight pack is your best bet. With a capacity of 30-50 liters, these backpacks can handle the essentials for a short stay in the outdoors, including a compact sleeping bag, cooking gear, clothing layers, and a small tent or shelter. Overnight packs are designed to offer a good balance between capacity and portability, ensuring you can carry what you need without feeling overly burdened.
Many models come with additional features like padded hip belts, adjustable straps, and various pockets, which are essential for maintaining comfort and distributing weight evenly. When learning how to pack a backpack as a beginner’s guide, an overnight pack is a great starting choice, offering space without overwhelming bulk. Its larger capacity allows you to bring necessary gear for an enjoyable overnight experience, and it still leaves room for a few personal touches, like a camera or small journal.
Multi-Day Packs (50+ Liters)
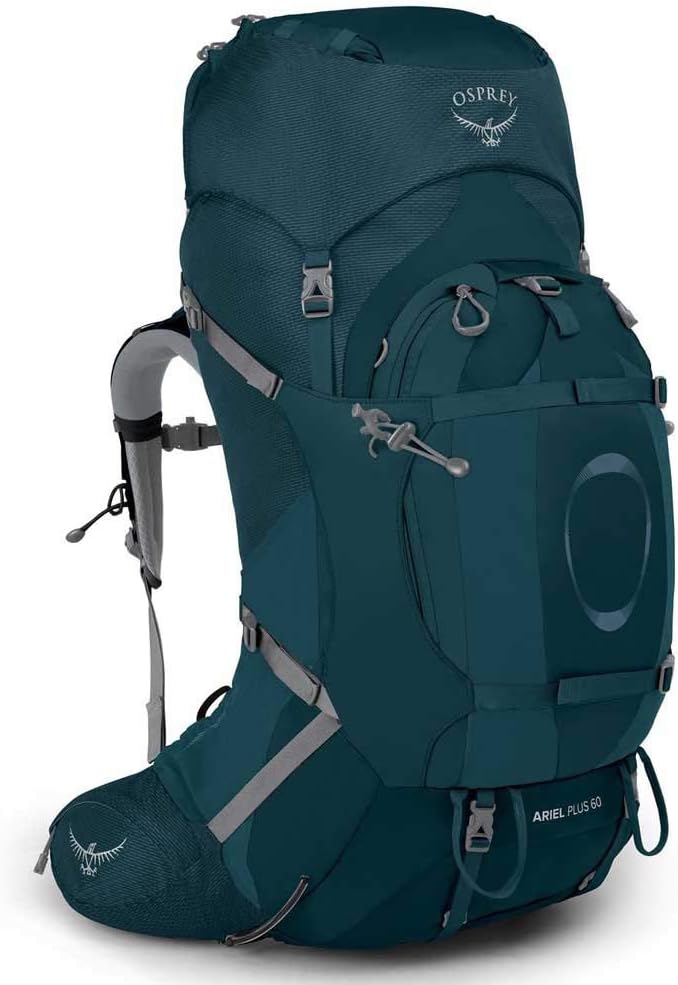
Multi-day packs, typically with a capacity of 50 liters or more, are essential for extended trips that last several days or even weeks. These backpacks are built for carrying all the essentials of long treks, including a sleeping bag, food supplies, a larger shelter, extra clothing, cooking equipment, and emergency gear. Multi-day packs are often equipped with advanced features such as reinforced frames, heavily padded straps, and ample external pockets, making them suitable for rugged terrain and heavier loads.
For beginners, choosing a multi-day pack requires careful consideration of fit and weight distribution to prevent strain on your back and shoulders. These packs are also customizable, with various compartments and straps that can hold items like trekking poles or bulky sleeping pads on the outside. If you’re planning a long adventure, investing in a quality multi-day pack will make your trip more comfortable and manageable, helping you stay organized and prepared, regardless of what the journey brings.
Organize Items by Weight and Importance
An essential part of learning how to pack a backpack effectively is understanding the importance of weight distribution. Packing with balanced weight in mind helps avoid strain on your back and shoulders, making it easier to carry your backpack for long periods. As a general rule, heavier items should be packed toward the center of your bag, closer to your back. This placement stabilizes the load, preventing it from swaying as you walk and keeping the backpack from feeling top-heavy. For items you use frequently, aim to keep them easily accessible near the top or in outer pockets to save time and effort while on the go.
Packing Zones
To optimize space and ensure comfort, think of your backpack in distinct packing zones:
- Bottom Zone: This is where you should pack lighter items that you won’t need frequently. Examples include a sleeping bag, extra clothes, or any lightweight gear that won’t add much bulk. Placing these items at the bottom not only fills out the backpack but also provides a stable base for the heavier items above.
- Core Zone: The middle section of your backpack, near your back, is best for heavy items like cooking gear, food, or a water reservoir. Keeping these items close to your body ensures a balanced load, which is essential for stability and comfort. This central placement is a key aspect of how to pack a backpack effectively, as it helps center the weight and reduces the strain on your back.
- Top Zone: The top of the backpack should be reserved for essentials that you might need on short notice, such as a rain jacket, map, or snacks. Having these items within easy reach means you won’t have to dig through your pack every time you need something, making your journey smoother and more convenient.
By organizing items according to weight and importance, you’ll create a balanced, comfortable load, making your backpack easier to carry and ensuring you’re well-prepared for any adventure.
Use Packing Cubes for Efficient Organization
Packing cubes are a game-changer when it comes to staying organized while traveling. By dividing items into separate cubes, you can keep your belongings neat and accessible, which ultimately saves space and time. Rather than rummaging through a messy backpack to find a specific item, packing cubes allow you to categorize and compartmentalize your essentials. For example, designating one cube for clothes, another for toiletries, and yet another for electronics ensures everything has a designated place. This setup is especially useful on longer trips where organization plays a key role in making your journey more comfortable and stress-free. With packing cubes, you’ll know exactly where to look for each item, and keeping your belongings organized becomes effortless.
Tips for Packing Cubes
- Color-Code: Assigning colors to different categories can simplify your packing process. For instance, use a blue cube for clothes, a green one for toiletries, and another distinct color for electronics. Color-coding not only helps with organization but also makes it easier to locate specific items without opening every cube in your bag.
- Compress: If you have bulky items, consider using compression cubes. These cubes are specially designed to compress clothing, freeing up extra space in your backpack. Compression cubes are particularly useful for items like jackets, sweaters, or other larger clothing pieces that would otherwise take up too much room.
By using packing cubes and following these simple tips, you can keep your backpack organized, allowing you to make the most of your storage space.
Pack Essentials for Easy Access
When planning how to pack a backpack, keeping essential items easily accessible is key to a hassle-free trip. Essentials like maps, snacks, a water bottle, and a first-aid kit should be stored in places you can reach quickly without having to unpack everything. By placing these items in outer pockets or the top compartment of your backpack, you save yourself the effort of digging through your bag in urgent or time-sensitive situations. This setup is particularly helpful for staying hydrated, navigating efficiently, and being prepared for any emergencies while on the go.
Must-Have Essentials
- Hydration: Staying hydrated is crucial on any trip, so ensure your water bottle or hydration reservoir is within easy reach. Many backpacks feature side pockets for water bottles, or you can use a hydration pack with a tube to drink without stopping.
- Navigation: Keeping navigation tools, such as maps or a GPS device, in an accessible pocket allows you to quickly check your route whenever needed. Being able to easily grab your navigation tools is important, especially if you’re exploring unfamiliar areas or frequently checking the trail.
- Emergency Kit: Pack basic first-aid supplies, a flashlight, and an emergency shelter in an outer pocket or top compartment. This way, if you or someone else needs immediate care, you can respond swiftly without unpacking. Including a whistle and fire starter in this kit is also recommended for emergency preparedness.
With these essentials stored in accessible spots, you’ll be ready for whatever your adventure brings, from quick snack breaks to urgent situations.
Use the Backpack’s Straps and Loops for Extra Gear
Learning how to pack a backpack efficiently as a beginner involves making use of every available feature your backpack offers, including straps and loops. These additional components are perfect for carrying bulky or awkwardly-shaped items that don’t fit neatly inside your pack. By attaching gear to the outside, you free up valuable internal space while still keeping your essential items accessible. Most backpacks come with a variety of straps and loops designed specifically for this purpose, allowing you to securely carry everything you need for your adventure. Whether you’re carrying a sleeping pad, trekking poles, or other equipment, utilizing these features ensures that your backpack stays balanced and organized.
Strap Placement Tips
- Top Straps: These are ideal for securing lightweight items like a sleeping bag. By placing it at the top of your pack, you ensure it’s easy to reach and won’t cause your bag to become unevenly loaded.
- Side Straps: Use side straps to secure longer items such as trekking poles or tent poles. These items are often too long to fit inside the pack, but side straps keep them firmly in place without causing unnecessary bulk.
- Bottom Loops: The bottom loops of your backpack are great for carrying items like sleeping mats or camp shoes. Attaching these items here helps keep your pack’s center of gravity low and maintains balance, ensuring you can carry your gear comfortably.
By taking advantage of the straps and loops on your backpack, you can maximize your packing efficiency and comfort, making your trip much more enjoyable. This approach is a vital part of how to pack a backpack as a beginner, ensuring you’re well-prepared for your journey.
Roll Your Clothes for Space-Saving Efficiency
One of the most effective strategies in how to pack a backpack is rolling your clothes instead of folding them. Rolling not only helps maximize the space in your bag but also prevents unnecessary wrinkles, ensuring that your clothes stay neat throughout your trip. This simple packing technique allows you to fit more items into your backpack without the hassle of having to rearrange everything. When combined with compression bags, which further reduce the volume of your clothing, you can make the most out of every inch of space in your pack. This method is particularly helpful when you’re packing for a multi-day trip or need to carry several clothing items but want to minimize the bulk.
Benefits of Rolling Clothes
- Space Saving: Rolling clothes helps to reduce their bulk, making it easier to pack more items into your bag. This is especially important when you’re trying to make the most of limited backpack space.
- Organization: Rolled clothes are easier to organize than folded ones. You can quickly spot what you need, as the rolled-up garments remain in a compact, organized form, making it simple to find specific items without disrupting the rest of your pack.
- Wrinkle Prevention: Unlike folded clothes that can crease easily, rolling helps prevent wrinkles and keeps your clothes looking fresh. This is particularly useful for delicate fabrics or clothes that you’ll be wearing immediately upon arrival.
By rolling your clothes and using compression bags, you ensure your packing process is as efficient as possible, freeing up space for other essentials while keeping your clothes organized and wrinkle-free.
Test the Fit Before Heading Out
Once you’ve packed your backpack, it’s crucial to test the fit before you head out on your journey. How to pack a backpack effectively isn’t just about fitting everything in—it’s also about ensuring that your pack is comfortable to carry. The best way to check this is by wearing the backpack and making adjustments to the straps, hip belt, and load lifters to find the most comfortable and balanced fit. Proper adjustment is essential for avoiding discomfort, pain, or injury during your trip. A well-adjusted backpack will allow you to carry the weight evenly across your body, making it easier to move and navigate through your adventure.
Adjustment Tips
- Tighten Shoulder Straps: The shoulder straps should be adjusted to ensure the pack sits snugly on your back. If the straps are too loose, the pack will hang too low and strain your shoulders. Adjust them so the backpack rests comfortably between your shoulder blades.
- Secure Hip Belt: The hip belt is a key component in weight distribution, and about 80% of the pack’s weight should rest on your hips rather than your shoulders. Tighten the hip belt until it fits comfortably around your waist, transferring most of the load off your shoulders and onto your hips for better support.
- Adjust Load Lifters: The load lifters are located near the top of the backpack and can be adjusted to bring the weight closer to your body. By pulling the load lifters, you can shift the weight toward your center of gravity, making the pack feel more stable and balanced as you move.
By making these small adjustments, you ensure that your backpack is not only packed well but also comfortable to carry for extended periods. Testing the fit before you start your trip is a crucial step in how to pack a backpack, ensuring that you are physically prepared for whatever your adventure brings.
Packing Order for a 7-10 Day Trip with Osprey Exos 48 Backpack
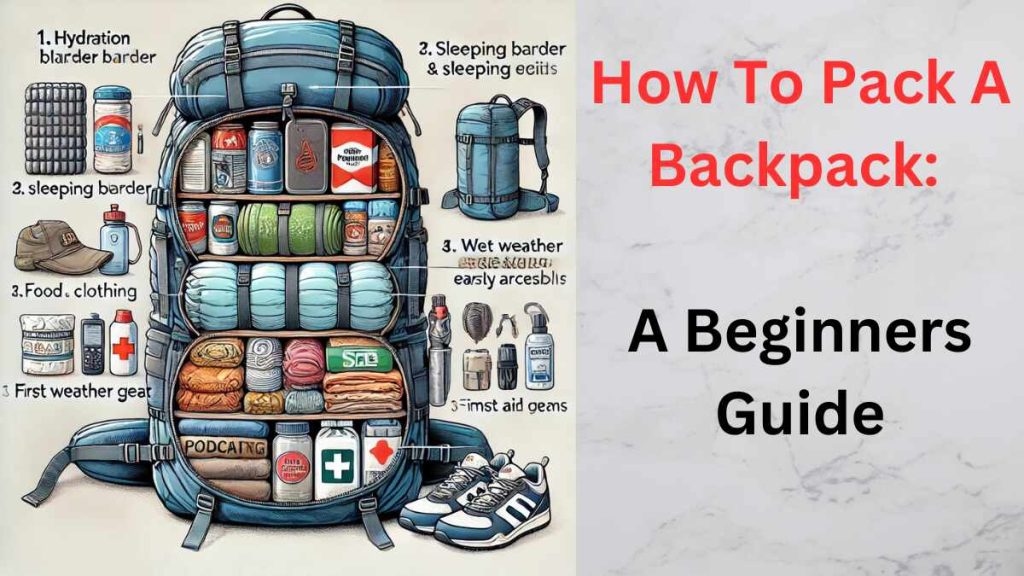
When packing for a 7-10 day, three-season trip, I rely on my Osprey Exos 48 Backpack (Size L), which has a capacity of 51 liters. Over the past two years, I’ve found this pack to be the perfect size for my gear, including food, as I can comfortably fit everything I need. Here’s the packing order I use to maximize space and ensure I can easily access essential items during my trip:
1st Layer: Hydration and Sleeping Essentials
- Hydration Bladder: Positioned at the top of the pack for easy access and to ensure I stay hydrated throughout the trip.
- Pack Liner (70L size): This protects my gear from water and elements, keeping everything dry.
- Sleeping Bag: I place my sleeping bag in the bottom of the pack as it is lightweight and compresses well.
- Sleeping Mat: Tucked next to the sleeping bag for quick access at camp.
- Sleeping Bag Liner: Packed with the sleeping bag for extra warmth or added protection from dirt.
- Jetboil Stove: Placed near the sleeping mat to keep the weight low and balanced.
2nd Layer: Food and Additional Clothing
- Food (up to 7 days): I store my food, with the current day’s meals at the top of this layer for quick access. This ensures I can easily grab what I need during the day.
- Clothing: Clothes are packed in a way that maximizes space and prevents wrinkles, with heavier items at the bottom for better weight distribution.
- First Aid Kit: Placed alongside the food for easy access in case of an emergency.
3rd Layer: Wet Weather Gear
- Wet Weather Gear: I store my rain jacket, pants, and poncho in this layer to keep them accessible during wet conditions without having to dig through the pack.
4th Layer: Outside Pack Liner
- Layer 4 Gear: Items that I don’t mind getting a little dirty or damp are packed outside of the pack liner for quicker access, such as a rain cover or an extra layer of insulation.
5th Layer: Pack Brain (Top Compartment)
- Podcasting Equipment: As an avid podcaster, I keep my equipment in the brain pocket to keep it organized and protected.
- Small Accessories: Things like a compass, multitool, battery pack, and charging cables are easy to access in the brain pocket.
- Toiletries: I place my toiletries here, ensuring they’re easily reachable but not in the way.
- Lunch for the Day: I store my lunch in the top compartment for easy access while on the go.
- Long Handled Spoon: I keep it here for convenience when preparing meals.
- Keys and Wallet: My keys and wallet are secured in the internal brain pocket for safekeeping.
This packing order has worked well for me, balancing weight distribution, ease of access to essentials, and organization. With everything packed in its designated place, I can enjoy a smooth and efficient trip without unnecessary hassle.
Conclusion: How to Pack a Backpack – A Beginner’s Guide
In conclusion, mastering how to pack a backpack is essential for any beginner looking to travel or go on an adventure. By following the steps outlined in this guide, you can ensure that your backpack is packed efficiently, comfortably, and in a way that allows for easy access to your essentials. From selecting the right backpack to utilizing packing cubes and testing the fit, each tip plays a vital role in maximizing space, maintaining comfort, and staying organized throughout your journey. Packing smartly not only makes your trip more enjoyable but also helps prevent unnecessary stress and discomfort along the way.
If you found this guide helpful, please like and share this post with others who may benefit from it. We’d love to hear your thoughts and experiences on packing in the comments below. Your feedback helps us create even better content for you and fellow travelers!

