Hydration backpacks are a game-changer for outdoor enthusiasts, but the question is “how to use a hydration backpack”. Whether you’re pounding the pavement on a run, conquering a mountain trail, or simply enjoying a long day at the park, staying hydrated is crucial. But fumbling with water bottles can slow you down and break your rhythm. Hydration backpacks offer a convenient, hands-free solution, allowing you to stay refreshed without stopping your activity.
This guide will walk you through everything you need to know about using your hydration backpack, from filling it up to proper care and cleaning. With a few simple steps, you’ll be a hydration pack pro, ready to conquer any adventure without ever feeling parched.
Post Contents
- 1 What is a Hydration Backpack?
- 2 Mastering Your Hydration backPack: A Step-by-Step Guide
- 3 When Should You Use a Hydration backpack Pack?
- 4 Hydration Backpack Variety: Choosing the Right Pack for Your Needs
- 5 factors to consider when choosing a hydration backpack
- 6 Conclusion: how to use a hydration backpack
What is a Hydration Backpack?
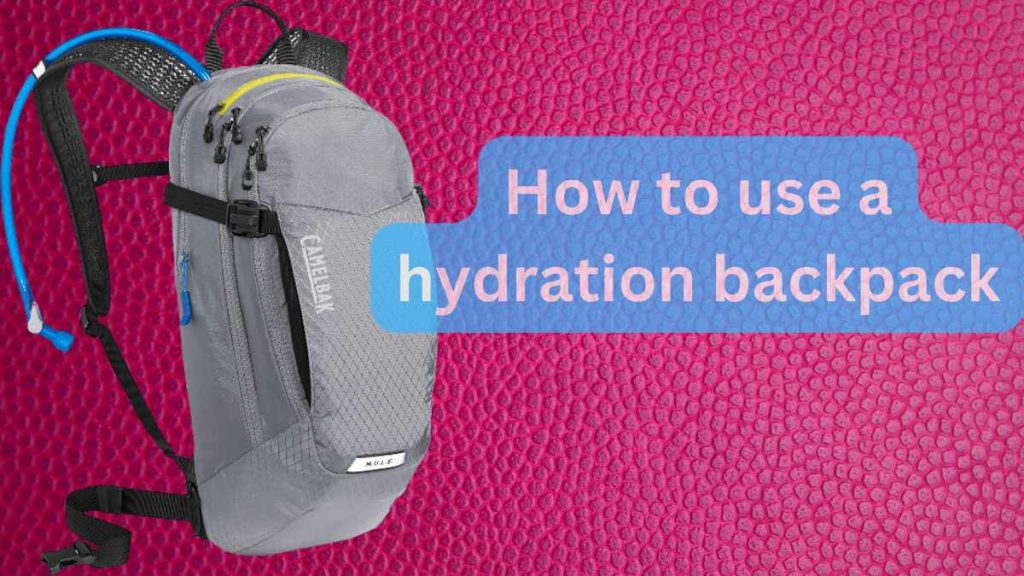
The great outdoors beckon, but staying hydrated during your adventures can be a challenge. Fumbling with water bottles disrupts your flow, and carrying them can feel cumbersome. Enter the hydration backpack, a lifesaver for those who crave convenience and hands-free refreshment. But what exactly is a hydration backpack, and how does it work?
The Backpack: Your Gear-Carrying Companion
At its core, a hydration backpack functions like a regular backpack. It provides storage space for all your essential gear, whether you’re hitting the trails for a hike, conquering a cycling route, or simply enjoying a day at the park. This storage compartment allows you to pack snacks, sunscreen, an extra layer of clothing, or any other necessities you might need on your adventure.
The Hydration Reservoir: The Heart of the System
Nestled within the backpack is the key component – the hydration reservoir, also known as a bladder. This flexible container, typically made from BPA-free plastic or rubber, holds your water (or even sports drinks) and forms the core of the hydration system. The size of the reservoir will vary depending on the backpack, with capacities ranging from a few liters for short outings to larger options for extended adventures.
The Drinking Tube: Connecting You to Hydration
A thin hose, the drinking tube, acts as the bridge between the reservoir and your mouth. This tube snakes its way up from the reservoir, often through a dedicated sleeve in the backpack strap, and ends near the shoulder strap with a bite valve.
The Bite Valve: Hands-Free Sipping
The bite valve is the magic that allows for hands-free drinking. This mouthpiece sits at the end of the drinking tube and is designed to open when you bite down on it. This allows water to flow through the valve and into your mouth, ensuring you can stay hydrated without ever stopping your activity.
Hydration Backpacks: A Spectrum of Sizes and Features
Hydration backpacks come in a variety of sizes and configurations to suit different needs. Some are minimalist, focusing primarily on holding the reservoir and offering minimal storage space for essentials. Others resemble traditional backpacks, featuring dedicated compartments for both your gear and your water supply. The size and feature set you choose will depend on the activities you plan to use it for.
Mastering Your Hydration backPack: A Step-by-Step Guide
Hydration backpacks are designed for effortless on-the-go hydration, but getting the most out of them requires a little know-how. This guide will walk you through everything you need to know, from prepping your pack to proper care and cleaning.
1. Gearing Up: Filling Your Hydration Reservoir
- Locate the reservoir: Most backpacks have a dedicated sleeve for the reservoir, usually accessible through the back panel.
- Cleanliness is key: Before your first use, and regularly thereafter, wash the reservoir with warm soapy water and a mild dish soap solution. Let it dry completely before refilling.
- Fill ‘er up!: Unscrew the reservoir’s cap (usually located at the top or bottom) and fill it with clean water or your preferred sports drink. Check the manufacturer’s instructions for any temperature limitations.
- Avoid overfilling: Most reservoirs have a fill line marked on the side. Don’t exceed this line, as overfilling can lead to leaks and a sloshing sensation while you move.
- Secure the cap: Once filled, screw the cap back on tightly to prevent leaks.
2. Assembling Your Pack: Putting it All Together
- Slide it in: Carefully insert the filled reservoir into the designated sleeve within the backpack.
- Thread the hose: Locate the opening where the drinking tube exits the backpack. Feed the hose through this opening and guide it up the shoulder strap, usually through a dedicated sleeve.
- Connect the bite valve: Most bite valves simply screw onto the end of the drinking tube. Ensure a secure connection to prevent leaks.
- Clip it in: Attach the bite valve to the designated clip on the shoulder strap for easy access while you’re on the move.
3. Taking a Sip: The Art of Hands-Free Hydration
- Priming the hose: Before your first sip, suck on the bite valve to purge any air that might be trapped inside the hose. You may need to do this a few times.
- Bite and sip: When you’re ready for a drink, simply locate the bite valve on your shoulder strap and bite down on the mouthpiece. This will open the valve and allow water to flow.
- Adjust the flow: Some bite valves allow you to control the flow rate by how hard you bite. Experiment to find a comfortable flow.
4. Staying Hydrated Throughout Your Adventure
- Monitor your water level: Most reservoirs have a measurement scale on the side, so you can keep track of how much water you have left.
- Sip regularly: Don’t wait until you’re thirsty to drink. Take regular sips throughout your activity to stay consistently hydrated.
- Refill when needed: Be prepared to refill your reservoir when necessary. Depending on the duration and intensity of your activity, you may need to refill multiple times.
- Cleaning the bite valve: After each use, remove the bite valve and rinse it thoroughly with clean water. Some manufacturers recommend soaking it in a mild vinegar solution to remove any residue or bacteria buildup.
5. Maintaining Your Hydration backPack: Post-Adventure Care
- Empty and dry the reservoir: Once you’re done with your activity, empty the remaining water from the reservoir. Leave it open to air dry completely to prevent mold growth.
- Clean the reservoir: Regularly wash the reservoir with warm soapy water and a mild dish soap solution. You can also use a reservoir cleaning kit for a more thorough cleaning.
- Dry thoroughly: After washing, ensure all parts of the reservoir, including the hose and bite valve, are completely dry before storing.
- Store it open: Don’t store the reservoir with the cap screwed on tight, as this can trap moisture and promote mold growth. Leave it slightly open to allow for air circulation.
By following these steps and practicing proper care, your hydration backpack will become your trusty companion on all your outdoor adventures, ensuring you stay hydrated and refreshed no matter what the activity throws your way.
When Should You Use a Hydration backpack Pack?
Using a hydration pack can be highly beneficial in a variety of situations where easy and consistent access to water is crucial. Here are some scenarios when you should consider using a hydration pack:
Long-Distance Running and Marathons:
Hydration packs allow runners to drink water without stopping, maintaining their pace and avoiding dehydration over long distances.
Hiking and Backpacking:
These activities often take you far from water sources, and a hydration pack can carry enough water for several hours or even a whole day, making it easier to stay hydrated while on the move.
Cycling:
For road biking or mountain biking, hydration packs provide a hands-free way to drink water, ensuring you don’t have to slow down or stop to hydrate.
Trail Running:
Trail runners benefit from hydration packs as they often traverse rugged terrain where stopping to drink from a bottle can be impractical.
Adventure Races and Obstacle Course Events:
These events can last several hours and involve intense physical activity. Hydration backpack allow participants to carry water and sometimes even energy gels or snacks.
Hot Weather Activities:
When engaging in any outdoor activity in hot weather, having a hydration pack helps ensure you have a sufficient water supply to prevent heat exhaustion and dehydration.
Skiing and Snowboarding:
Hydration packs are also useful in cold weather activities, as they can help prevent dehydration caused by high-altitude exertion and dry, cold air.
Military Training and Operations:
Hydration packs are commonly used in military settings where personnel need to remain hydrated during prolonged physical activity without the opportunity to carry and frequently use water bottles.
Emergency Preparedness:
Having a hydration pack as part of an emergency kit can be valuable, ensuring you have an accessible water supply if you need to move quickly or cannot easily access other water sources.
Camping:
Even when not hiking, having a hydration pack can be useful for day trips or activities around a campsite, providing easy access to water without needing to return to your main water supply.
Using a hydration pack in these situations ensures that you can maintain proper hydration levels, which is essential for performance, safety, and overall health during physical activities.
Hydration Backpack Variety: Choosing the Right Pack for Your Needs
Hydration backpacks come in various types, each designed to suit different activities and needs. Here are the main types of hydration backpacks:
1. Running Hydration Packs:

- Hydration backpack Vests: Lightweight and designed to fit snugly, these packs often have multiple pockets for gels and small items. They typically come with a 1-2 liter bladder.
- Minimalist Packs: Streamlined for speed, these packs prioritize low weight and are ideal for shorter runs or races.
2. Hiking and Backpacking Hydration Packs:

- Daypacks: Designed for day hikes, these packs often include extra storage for gear, snacks, and other essentials. They typically have a 2-3 liter bladder.
- Multi-Day Packs: Larger capacity packs suitable for longer hikes and backpacking trips. They include more storage space and can accommodate larger hydration bladders.
3. Cycling Hydration backpack:

- Mountain Biking Packs: Built for rough terrain, these packs are durable and have additional storage for tools, snacks, and protective gear.
- Road Cycling Packs: Streamlined and aerodynamic, these packs are lightweight with limited additional storage, focusing on hydration and essentials.
4. Skiing and Snowboarding Hydration Packs:

- Insulated Packs: These packs have insulation around the bladder and tube to prevent freezing in cold conditions. They often include storage for extra layers and gear.
5. Military and Tactical Hydration backpack Packs:
- Tactical Packs: Rugged and designed for durability, these packs often have MOLLE webbing for attaching additional gear. They are suitable for military use, tactical training, and rugged outdoor activities.
6. General Use Hydration Packs:
- All-Around Packs: Versatile packs suitable for various activities such as festivals, travel, or casual hiking. They offer moderate storage and hydration capacity.
- Youth Packs: Smaller-sized packs designed to fit children and teenagers, with appropriately sized bladders and storage capacity.
7. Specialty Hydration Packs:
- Hydration Waist Packs: Also known as hydration belts, these are worn around the waist and are ideal for shorter activities like running or hiking where minimal storage is needed.
- Integrated Hydration Backpacks: Some backpacks come with integrated hydration systems, designed for specific sports or activities like trail running or endurance events.
When choosing a hydration pack, consider the specific requirements of your activity, including the duration, terrain, weather conditions, and the amount of gear you need to carry. This will help you select the most appropriate type of hydration backpack for your needs.
factors to consider when choosing a hydration backpack
Here’s a breakdown of the key factors to consider when choosing a hydration backpack:
1. Activity:
- Running & Cycling: Prioritize lightweight, streamlined packs with bounce-free designs. Minimalist packs or running vests with snug fits are ideal for maintaining speed and comfort.
- Hiking: Opt for a versatile backpack that balances hydration capacity with storage space for essentials like snacks, extra clothing, and a first-aid kit. Choose a size based on the duration of your hikes (day hikes vs. multi-day backpacking).
- Other Activities: Consider the specific demands of your activity. Rock climbing or mountain biking might benefit from a pack with easy hose access, while on a leisurely bike ride, a smaller hydration pack or even a water bottle might suffice.
2. Hydration Needs:
- Activity Duration: Longer adventures require larger reservoirs to minimize refills. Think about how often you typically drink and choose a reservoir size that will comfortably last you between refills.
- Climate: If tackling extreme temperatures, consider opting for an insulated backpack. This will help maintain your water’s temperature, keeping it cool in hot weather or preventing freezing in cold weather.
3. Fit and Comfort:
- Try before you buy: This is crucial! A well-fitting pack will distribute weight comfortably and minimize bouncing during movement. Look for a snug but comfortable fit around your shoulders and torso.
- Adjustable straps: Ensure the pack has adjustable straps on the shoulders and possibly the hip belt (on larger packs) to allow for proper weight distribution and a customized fit.
4. Additional Features:
- Compartments: Look for compartments that fit your essentials and provide easy access. Consider features like dedicated pockets for snacks, keys, phone, or even trekking pole loops or helmet attachments depending on your activity.
5. Your Preferences:
- Material: Hydration backpacks come in various materials, each with its pros and cons. Nylon is durable but can be heavier, while polyester is lighter but might not be as abrasion-resistant. Consider the balance between weight and durability for your needs.
- Budget: Hydration backpacks range in price depending on features, brand, and size. Determine your budget and prioritize features that matter most to you.
By carefully considering these factors, you’ll be well on your way to selecting the perfect hydration backpack that becomes a trusty companion on all your outdoor adventures!
Conclusion: how to use a hydration backpack
In conclusion, hydration backpacks are a convenient and effective way to stay hydrated during any activity. By following these steps, you can ensure your backpack is set up properly, allowing you to easily access water throughout your adventure. Remember to clean your bladder regularly to maintain fresh-tasting water and a pleasant experience with your hydration pack. With a little practice, you’ll be a hydration pack pro in no time!


